Home > 4 Steps to Improve the Graphic Quality for Oculus Quest/Go App in Unity
4 Steps to Improve the Graphic Quality for Oculus Quest/Go App in Unity
Building an Oculus Go/Quest App in Unity for the first time, many people probably experience the jaggy graphic quality. I’ve been asked frequently how to make the UI crystal clear in Oculus Go/Quest app. In this blog, I will demonstrate 4 steps to dramatically increase your graphic quality for Oculus Go/Quest app in Unity.
Steps
-
Step 1.
Increase XRSettings.eyeTextureResolutionScale for better graphics. This property controls the actual size of eye textures as a multiplier of the device’s default resolution[1].
You can create a following script named VRRenderScale.cs and attach it to any game object in your scene. The higher render scale value, the better visual effect you get. However, Remember: This will tradeoff the performance. Usually, I set it to 1.5 because it could dramatically increase the graphic quality.using UnityEngine; using UnityEngine.XR; public class VRRenderScale : MonoBehaviour { void Start () { XRSettings.eyeTextureResolutionScale = 1.5f; } } -
Step 2.
Set your VR camera to Forward Rendering and Allow MSAA. Also, in Quality Setting, set 2x(or 4x) anti-aliasing for better visual quality. -
Step 3.
In your Quality Setting, turn VSync(Vertical Synchronization) off. Why tick VSync off? Here is some background information about VSync.
First, you will need to know the difference between Frame rate and Refresh rate.- The frame rate is determined by how powerful your CPU or GPU is.
- Refresh rate is determined by your monitor, ie, the number of times per second your monitor can redraw the screen[2].
Say, for your Oculus VR game, you run 90FPS, while if your refresh rate is lower than your frame rate, you will experience screen tearing. Vertical Synchronization is helpful to prevent Screen Tearing because it forces your frame rate the same as the refresh rate.
The best practice is to turn VSync off and enable it only if you experience screen tearing. Because by ticking it off, your performance would dramatically change. -
Step 4 (Optional).
If you have any Text and you found it isn’t clear in VR, you can either a) use TextMesh Pro
or
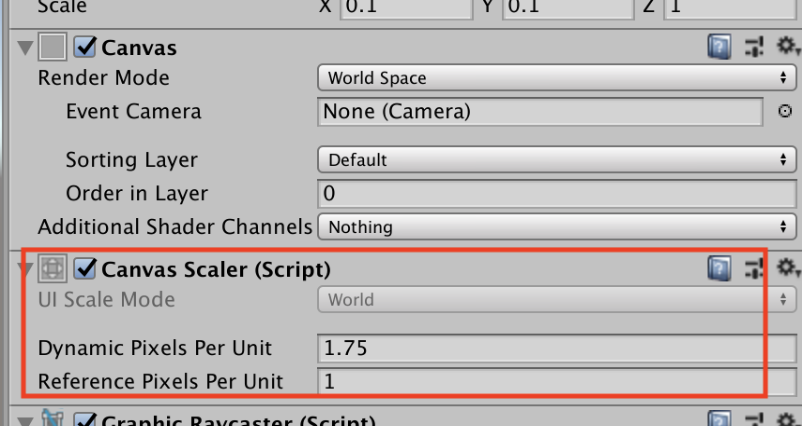
b) To achieve free anti-aliasing on text for VR: Use Canvas Scaler on a Worldspace Canvas. The UI should have a “Reference Pixels Per Unit” setting of 1, then alter “Dynamic Pixels Per Unit” until you slightly soften the edges of the text.[3]